Behind the Scenes of a Twitter Bot 🔍
Here's how I built a Twitter bot which generates a pencil sketch of any image when tweeted using #PicSketch

I'm here to share about the projects I've built so far as well as the best projects I come across using python!
Apart from coding, I love to read books based on Self-help & autobiographies, learn to play chess♟, and contribute to open source.
In this article, I'm going to introduce you to the code I wrote for building a Twitter bot and deploying it using one of the best free cloud hosting platform called, Heroku!
At the end, I'll share my learnings gained by building this project! 😃
Let's begin 💪
1. Get Access to Twitter API Keys
I had to create a separate Twitter account so that it can Tweet on its own behalf.
Next, I had to set up my Twitter Developer Profile (logged in with account to be used) and create an app inside it. After following all the instructions, the Elevated Access feature is unlocked. Once I have confirmed my account, it generated -- API Key, API Key Secret, and Bearer Token for my app. To generate & save Access Token and Access Token Secret keys, I went back to my project dashboard, clicked on my project, then clicked on the key icon of my app! All these keys were stored in a secure location for later use.
2. Coding in a virtual environment
Before installing the packages, the utmost important task is to create a virtual environment -- a directory that will contain all the necessary project files for the project to run.
First, I created a directory named twitter-sketch-bot and then I used the below commands to create and activate the virtual environment using Command Prompt :
python -m venv sketch-bot
source sketch-bot/bin/activate.bat
venvmodule creates a new directory called sketch-bot where all the required packages will be installed.sourcemeans the hard drive where I have created the directory.Second, Installing all the required packages inside the new environment :
pip install requests tweepy python-opencv pillow python-dotenv numpy
Third, Adding all of the above dependencies in requirements.txt file :
pip freeze > requirements.txt
3. Create required files for the project
Now, I added all the important files for this project inside twitter-sketch-bot folder! Let's review each file's context below :
images/-- folder to store sketch generated imagesbot.py-- where the actual code for the bot is written.env_load.py-- code for calling the twitter API keys usingosandpython-dotenv.gitignore-- for hiding the virtual environment and.envfile..env-- for storing all secret keys. (will be inside the virtual env!)
Heroku required files 👇
requirements.txt-- list of all the dependenciesruntime.txt-- Specifying a particular version of PythonProcfile-- a heroku based file where specific commands are executed by the app on startup
After adding all the above files, the directory structure should now look like this --- >
twitter-sketch-bot
  |---- images/
  |---- bot.py
  |---- env_load.py
  |---- .gitignore
  |---- requirements.txt
  |---- runtime.txt
  |---- Procfile
  |____ sketch-bot          # virtual env
           |____ .env
4. Actual coding begins! 👩💻
4.1 : bot.py file :
I have imported all the required dependencies :
import os
from env_load import load_twitter_env
from io import BytesIO
from time import sleep
import requests
import tweepy
import cv2
from PIL import Image
from PIL import ImageFile
import numpy as np
Explanation of the above imports
os-- module to intreact with the systemenv_load-- to load Twitter credentials using aload_twitter_env()function that is defined here.io-- here,BytesIOmodule is used to extract the image input from the user and pass the data directly to Twitter API.timemodule -- thesleep()method is used to stop the bot for some seconds after every user input!requests-- library used to receive HTTP requests from every image based tweets.tweepy-- library for accessing the Twitter API.cv2-- module used for transforming images! ✨ magic code is here!PIL-- library used to open and show the final output image (sketched ones!)numpy-- library for converting every input image into an array.
Authenticate, connect, login to the Twitter API.
# PIL.ImageFile.ImageFile Class Constant -- Whether or not to load truncated image files
ImageFile.LOAD_TRUNCATED_IMAGES = True

consumer_key, consumer_secret, access_token, access_token_secret = load_twitter_env()

auth = tweepy.OAuthHandler(consumer_key, consumer_secret)
auth.set_access_token(access_token, access_token_secret)

api = tweepy.API(auth, wait_on_rate_limit=True, wait_on_rate_limit_notify=True)
A function to check the image and send it to another function for transformation!
def tweet_image(image, username, status_id):
    if image.status_code == 200:
        i = Image.open(BytesIO(image.content))
        sketch(i)
        response = api.media_upload('images/sketch.jpg')
        api.update_status(status='@{0}'.format(username), in_reply_to_status_id=status_id, media_ids=[response.media_id])
    else:
        print("image app fail!")
Here...
api.media_upload()method uploads the sketched image fromimages/folder.api.update_status()is used to reply to the tweet of the user with the newly sketched image from the bot! ✨
Next, to write the image transformation function --- >
def sketch(i):
  pil_image = i.convert('RGB')
  open_cv_image = np.array(pil_image)

  open_cv_image = open_cv_image[:, :, ::-1].copy()
  img_gray = cv2.cvtColor(open_cv_image, cv2.COLOR_BGR2GRAY)
  img_invert = cv2.bitwise_not(img_gray)
  img_smoothing = cv2.GaussianBlur(img_invert, (21, 21), sigmaX=0, sigmaY=0)
  final_img = dodge(img_gray, img_smoothing)

  pil_image = Image.fromarray(final_img)
  return pil_image.save('images/sketch.jpg')
Explanation ---
- The above function uses
PILlibrary to convert the image into an array of values usingnumpy. - It uses
OpenCVpredefined models to convert the image to grayscale, i.e.,cv2.cvtColor(open_cv_image, cv2.COLOR_BGR2GRAY) - Inverting pixels -- this process helps to find the shady areas in the photo.
img_invert = cv2.bitwise_not(img_gray) cv2.GaussianBlurblurs an image using a Gaussian filter. This will give the sketch effect to the final artwork. 🎨- Blending the Artwork! Here, I'm going to blend the grayed and the blurred images. To do this operation, a function is needed to combine the images.
def dodge(x, y):
  return cv2.divide(x,  255 - y, scale=256)
It uses the cv2.divide() method which basically divides the pixel values of the image.
This function is used by passing in the images that has to be blended! 👉
final_img = dodge(img_gray, img_smoothing)
Finally, the image is converted back to a PIL Image and it is returned as a .jpg file!
Next, to create a class inheriting from StreamListener
class BotStreamer(tweepy.StreamListener):

  def on_status(self, status):
    username = status.user.screen_name
    status_id = status.id

    for media in status.entities.get("media",[{}]):
        try:
            if media.get("type",None) == "photo":
                image_content=requests.get(media["media_url"], stream=True)

            tweet_image(image_content, username, status_id)
            sleep(30)
        except tweepy.TweepError as e:
            print(e.reason)
        except StopIteration:
            break
Basically,
- the above class fetches the twitter username & latest tweet ID of the user.
for loopchecks for any image attached in a tweet. If there's any, it fetches the link usingrequests.get()method looking up for["media_url"].- Passes the link to the
tweet_image()function along with other 2 arguments and later sleeps for 30 secs before any other such tweet!
One last step! Creating a Stream object, connecting to the Twitter API using the Stream & filtering tweets by tracking using the #PicSketch
myStreamListener = BotStreamer()
stream = tweepy.Stream(api.auth, myStreamListener)

stream.filter(track=["PicSketch"])
Done! From here, the code is smaller and easy to understand!
4.2 : env_load.py file :
First, I have to set the credentials inside .env file --- >
API_KEY = "xxxxxxxxxxxxxxxxxxxxxx"
API_SECRET = "xxxxxxxxxxxxxxxxxxxxxxxxxxxxxxxxxxxxxxxxxxxxxxxxxxxxxxxxxxx"
ACCESS_TOKEN = "xxxxxxxxxxxxxxxxxxxxxxxxxxxxxxxxxxxxxxxxxxxxxxxxxxxxxxxx"
ACCESS_TOKEN_SECRET = "xxxxxxxxxxxxxxxxxxxxxxxxxxxxxxxxxxxxxxxxxxxxxxxx"
Of course, they have values but not to be shared publicly! 😏
Next, the code for loading the twitter credentials from system environment :
import os
from dotenv import load_dotenv
load_dotenv()

def load_twitter_env():
    consumer_key = os.getenv("API_KEY")
    consumer_secret = os.getenv("API_SECRET")
    access_token = os.getenv("ACCESS_TOKEN")
    access_token_secret = os.getenv("ACCESS_TOKEN_SECRET")
    return consumer_key, consumer_secret, access_token, access_token_secret
Using the pythondotenv library, I will call load_dotenv() method to load the credentials that has been set in the .env file before!
4.3 : .gitignore file :
I have used Python.gitignore template as it is a catch-all for many Python projects!
# Byte-compiled / optimized / DLL files
__pycache__/

# Virtual environment
sketch-bot/

# Environments
.env
The above files will be ignored by Git while committing with other files on Github!
Tip 💡 : personal credentials should not be pushed in both public and private repositories on github!!
4.4 : requirements.txt file :
If you remember, I locked these packages in the start after installing all of them! Have a look! 👇
certifi==2021.10.8
charset-normalizer==2.0.12
idna==3.3
numpy==1.22.3
oauthlib==3.2.0
opencv-contrib-python-headless==4.5.2.52
Pillow==9.1.0
PySocks==1.7.1
python-dotenv==0.20.0
requests==2.27.1
requests-oauthlib==1.3.1
six==1.16.0
tweepy==3.10.0
urllib3==1.26.9
4.5 : runtime.txt file :
Current version of python is specified! 🐍
python-3.9.5
4.6 : Procfile :
This file tells Heroku how to run the bot.py file by writing the below code --- >
worker: python bot.py
Let's start testing the code 🤓
5. Test Out the Script!
In the Command Prompt, test the script by running the following command from the twitter-sketch-bot directory along with the activated environment sketch-bot --- >
python bot.py
And, my bot is working! 🥳 Finally, let's launch this!!!
6. Deploy on Heroku 🚀
I had already set up my account on Heroku. Also, I had downloaded the Heroku CLI so that I can deploy easily!
Check whether the CLI is downloaded properly (using git bash) :
$ heroku --version
First, I had logged into my Heroku account from a web browser and clicked on New > Create new app in the top right corner of my main dashboard, and name the app as sketchy-bot
Second, using the CLI, I can log into my Heroku account and follow the prompts to set up an SSH key.
$ heroku login
It opens up a web browser for checking whether I have logged in or not!
Setting up credentials inside the app settings on Heroku --- > Dashboard > Settings > Config Vars > Reveal Config Vars button
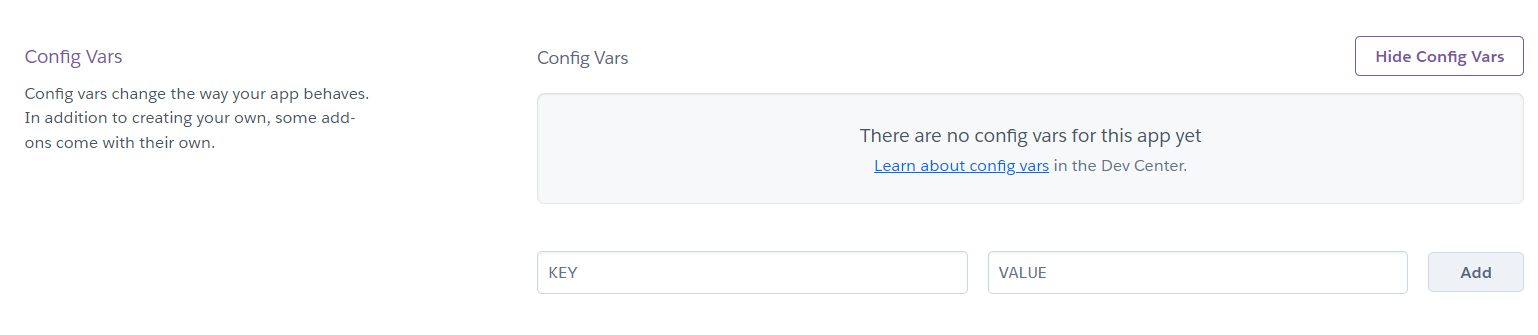
Learn more about config vars : here
Third, using the following commands while being active in twitter-sketch-bot directory 👇
$ git init
$ heroku git:remote -a sketchy-bot
$ git status
$ git branch -M main
$ git add -A
$ git commit -am ''make it better"
$ git push heroku main
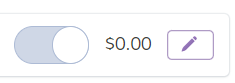
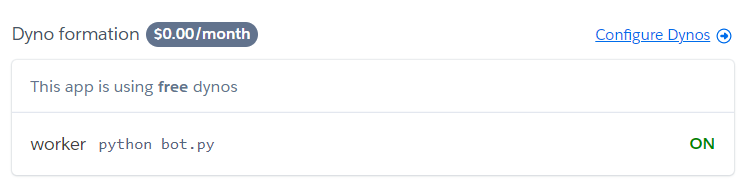
Lastly, activating the free dyno hours per month so that the bot functions 24 x 7! Heroku app Dashboard > Dyno formation > Configure Dynos > ✏ edit > toggle right > Confirm
Voila! The bot is live!!
Checking most recent logs after deploying the app!
$ heroku logs
You can try out this bot as it is live! 🎉
- Entire code and demo of the bot is available on my 🐙 Github
🌱 Learnings from the project :
Too many how to's...😅
- how to use the twitter API or any API in general.
- how to safely store personal credentials inside the
.envfile! - how to deploy the bot using heroku (free cloud hosting platform)
- how to use git version control
Thanks for reading about this project till the end!🙏 I hope you understood the code which was main motive behind writing this article.
If you found this project interesting, make sure to check the github code and share this article with everyone who would be interested to know about this bot! 😀
🤝 You can connect with me on Twitter & Github
Let me know your thoughts about this article in the comments below.


