
Don't let those bugs slow you down 🐛
Here's how a React newbie built a custom component with Streamlit


Intro
I am always fascinated by the flexibility and power of Streamlit. Some months ago, I created a custom component with Streamlit that wraps a React-based toggle component. But, the process was not as smooth as I thought it would be.
In this article, I will share my experience on how I fixed common errors while wrapping a React component into a Streamlit custom component!

Summarized views
What is Streamlit?
Streamlit is an open-source framework that allows you to build interactive web applications using Python. It is easy to use and requires very little setup. Also, it can wrap any javascript library or framework (React, Vue, etc...) to enhance the frontend experience.
What is a Streamlit Custom Component?
Custom Components are third-party Python modules or PyPI packages which can be
used inside Streamlit apps & can also pass data between Python & frontend code.
I wanted to experiment with this feature and came up with the idea to create a heart-shaped toggle in Python that will render an interactive slider using an external React component from Anatoliy Gatt. This would allow users to interact with the data in a friendly manner. 🧡
Development Stage
The easy part
At the start, I didn't know much about React but I'm aware of some JavaScript basics. But, as I started to integrate the React component with Streamlit, I began to encounter a lot of issues which comprised basic Python & Node.js errors. Thanks to Fanilo's comprehensive docs, I was then confident to create a structured component in React, even as a relative novice in the language.
The first two steps were achieved:
The toggle will call on the Python side with a
st_custom_togglefunction and will retrieve the frontend code from theStreamlitCustomToggleReact component.It will render the toggle using an external component.
Then, I published this version of the component as a PyPI package and shared it on my socials! One day, someone raised an issue on the GitHub repo saying that 'Component returns None'. Although, it should return True or False as anyone moves the toggle (see image 👇). This one was a little harder for me to tackle! 😬

Event handlers: the hard one strikes!
One of the biggest challenges was with data communication between the React component and Streamlit. I found it difficult to pass data from Streamlit to React and vice versa.
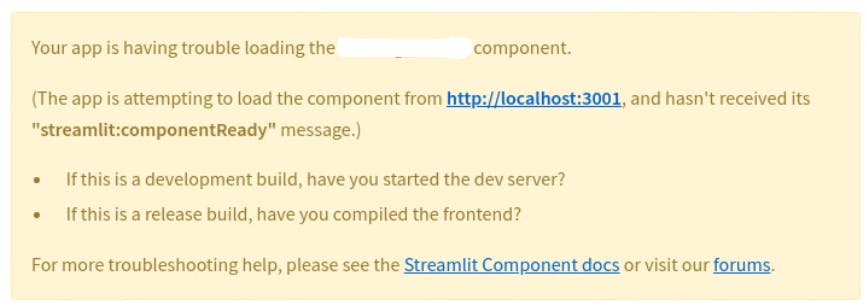
I faced errors with the event handlers too. I had to spend a lot of time watching many YouTube videos, reading blogs, and then tweaking the code to get it right. I came across this error several times when I didn't save the changes on the frontend side or didn't start the frontend server along with the python server, and did not save the final changes in the frontend build directory. 👇
Finally, React documentation helped a lot here.
Final Code Blueprint
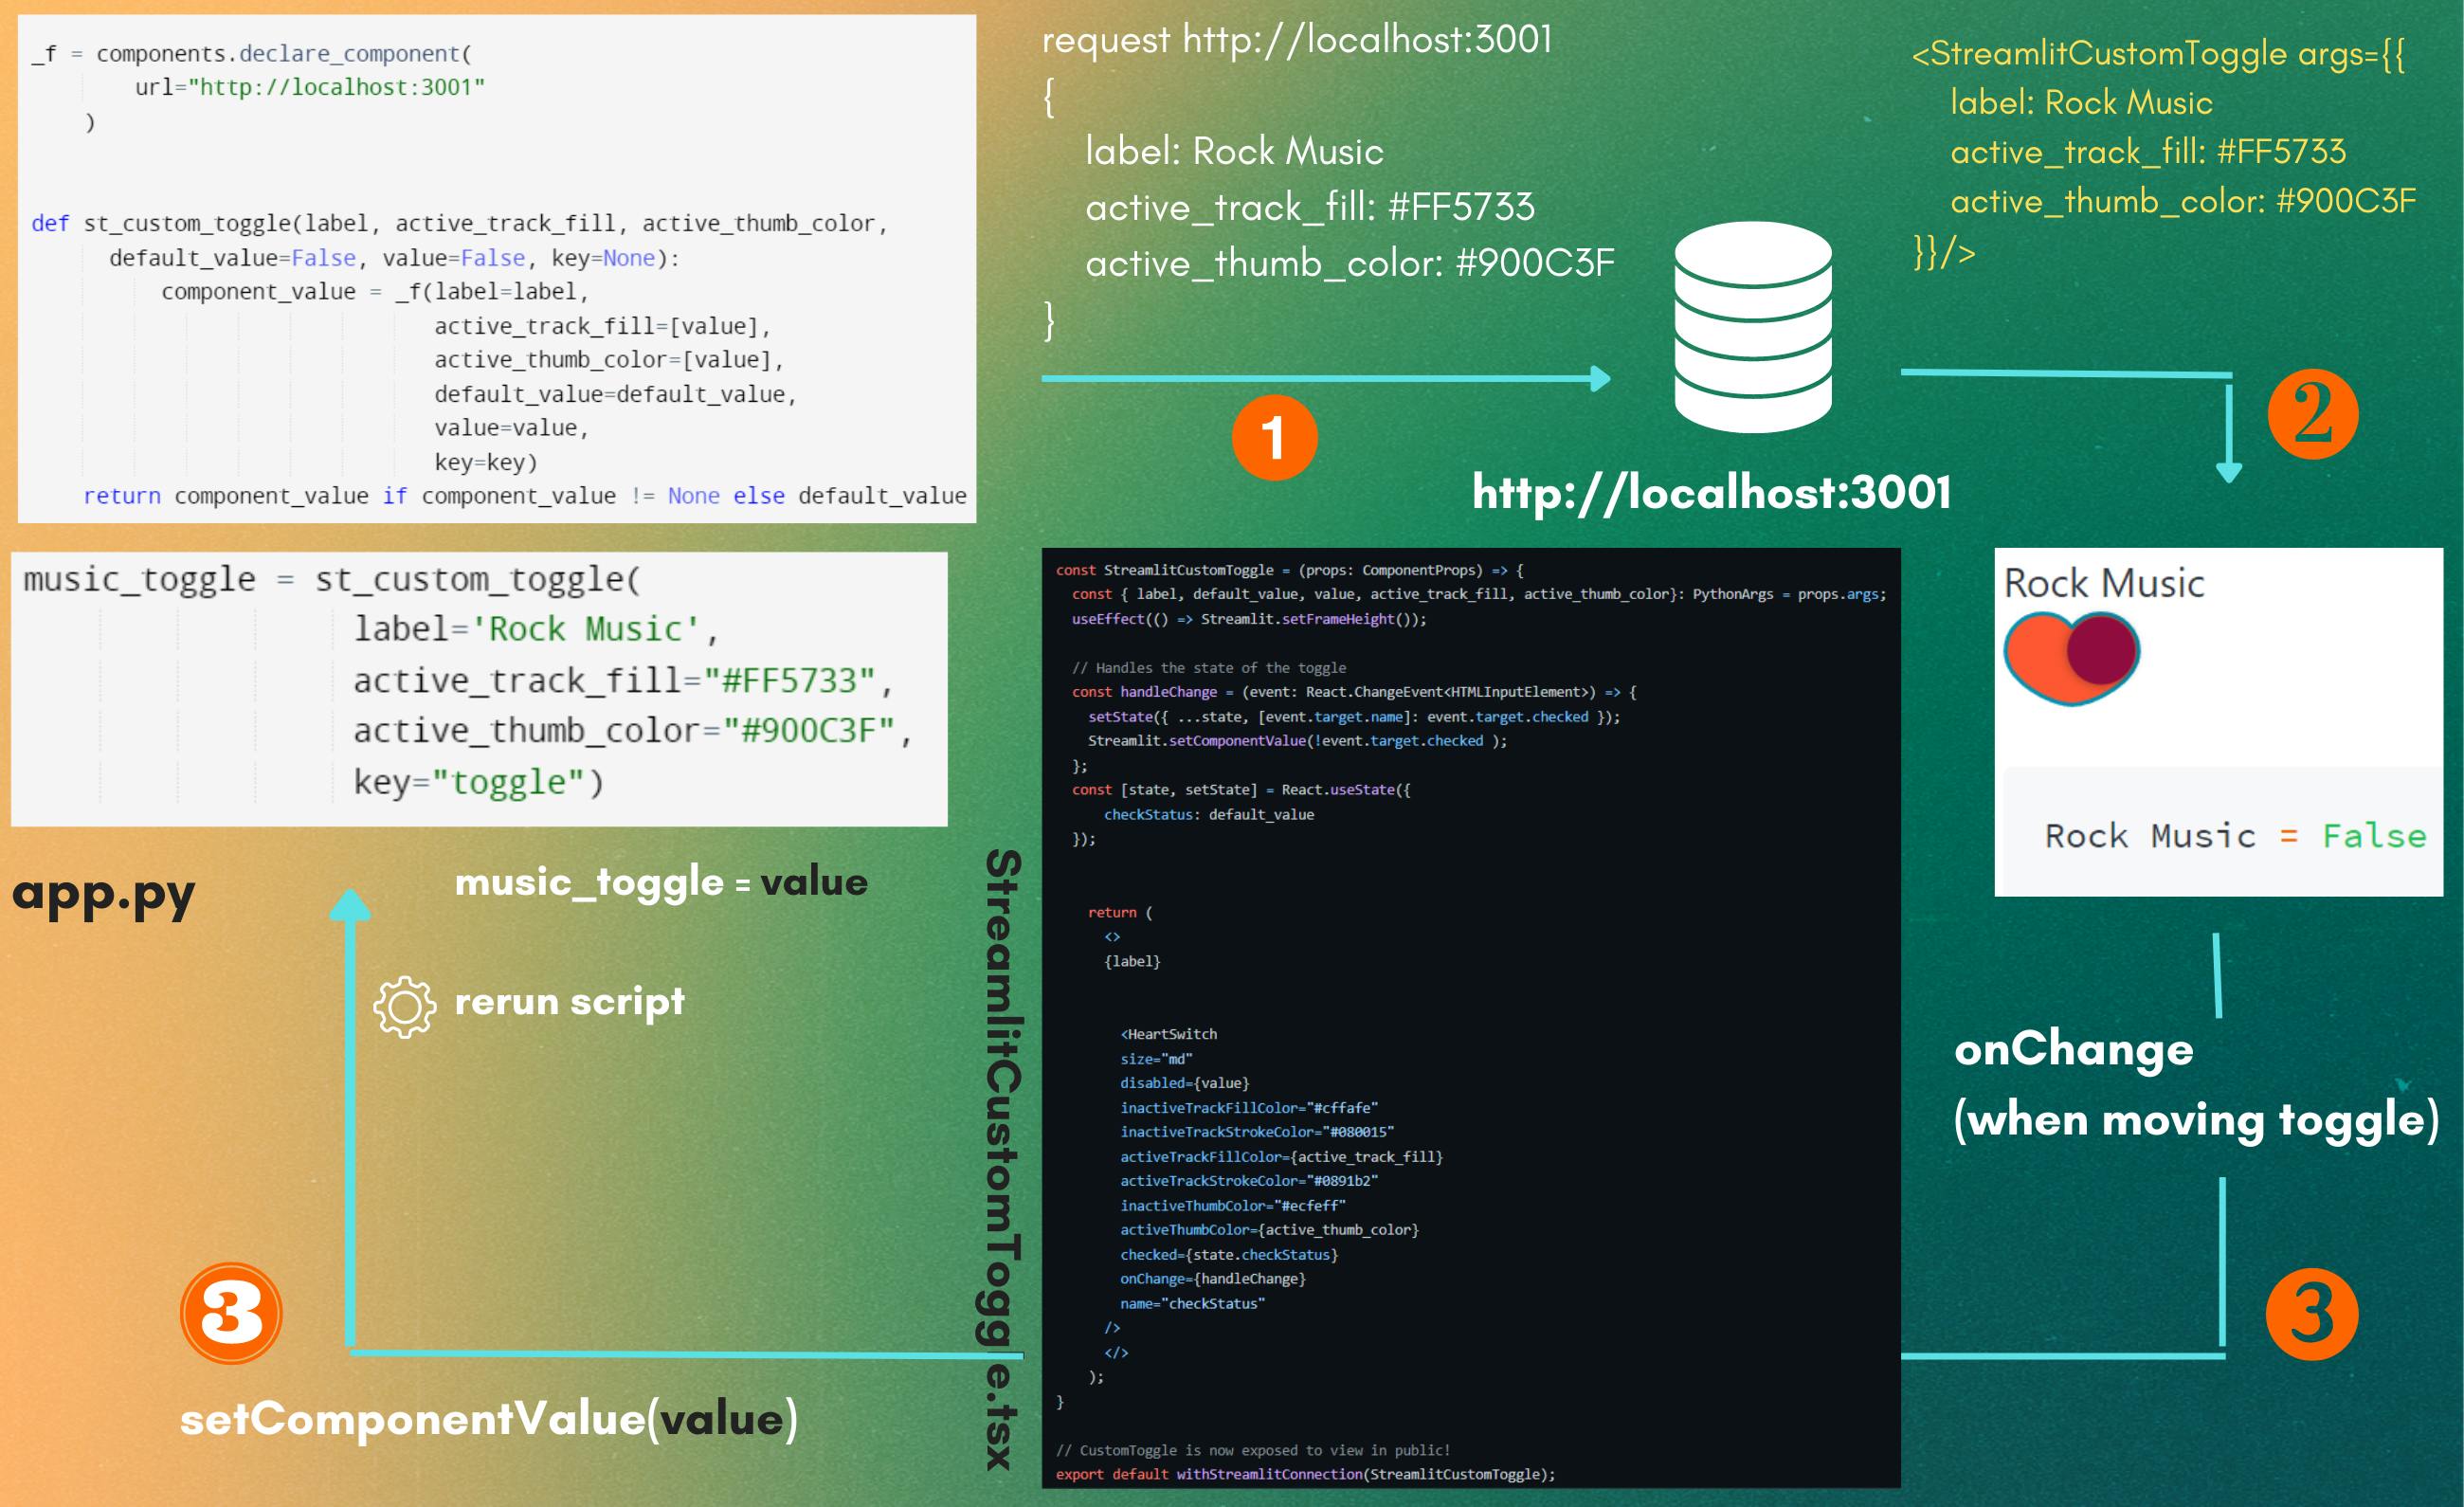
This is how the latest version of my custom component works! 👆
Breakdown of the code workflow:
Mapping a Streamlit call to frontend code
Using
declare_component, a function has initiated that interfaces with the React component on the web server,http://localhost:3001Then,
_component_func(a.k.a._f) calls the frontend code and transfers any Python argument as props to the React component in the template.This interface is further wrapped with the public method so anyone can interact with the toggle without being bound to the frontend interface.
Renders the toggle on the browser
As Streamlit is now linked to the React component, the frontend is now customizable using Python parameters which can pass it as
props.args_component_funcalso has thekeyargument that serves to prevent the component from remounting anytime its props are modified.
Handles interaction & Bidirectional data flow
Streamlit.setComponentValuemethod helps to push the data from the frontend into Streamlit.The
defaultargument comes into play when the user has not interacted with the component so far.
Despite all these, I was very focused to finish the custom component. It was a great feeling to see the custom component in action and be proud of what I had accomplished 💪.
P.S.: To be honest, my blueprint is an inspiration from Fanilo's docs which I've mentioned earlier! 😅
Lessons we can learn
"Debugging is like being a detective in a crime movie where you're also the murderer."
- Filipe Fortes
The quote sounds funny but it fits the situation I faced in my journey. 👀
Here are some tips to overcome debugging.
🙅♀️ Don'ts to keep in mind:
Following the code solutions from StackOverflow or blogs or videos as it is, will not help understand the root cause of any bug.
Not digging much information about the interaction for both frontend and backend.
👍 Do's to apply:
Google the right way to search about the specific bug you face. Use some search tips to find solutions to your problems.
Read & understand the documentation of the frontend and Streamlit. Trust me, it will help solve half of your problem.
Don't hesitate to ask for help on the forum.
I hope you find these tips helpful!
Outro
In conclusion, I faced a lot of ups and downs along the way, but I overcame them with patience, persistence, and hard work. If you are considering creating a custom component with Streamlit and React, I encourage you to definitely give it a try.
✨ You can try your hand with my component and look at the source code here.
Also, you can learn about more such components through my series or here, created by awesome folks like you!
Thanks for reading my story till the end. 🤗